Customize Login Page
A comprehensive guide to creating a professional authentication experience with ShipNowKit's flexible templates and OAuth providers.
📑 Selecting A Template
ShipNowKit provides two professionally designed authentication templates in the app/_templates directory:
- NotionLike
- ShipNowLike
To get started, copy your preferred template to your app directory:
# For NotionLike template
cp -r app/_templates/notion/signin app/
⚙️ Configuring Authentication Options
Configure Sign-in Methods
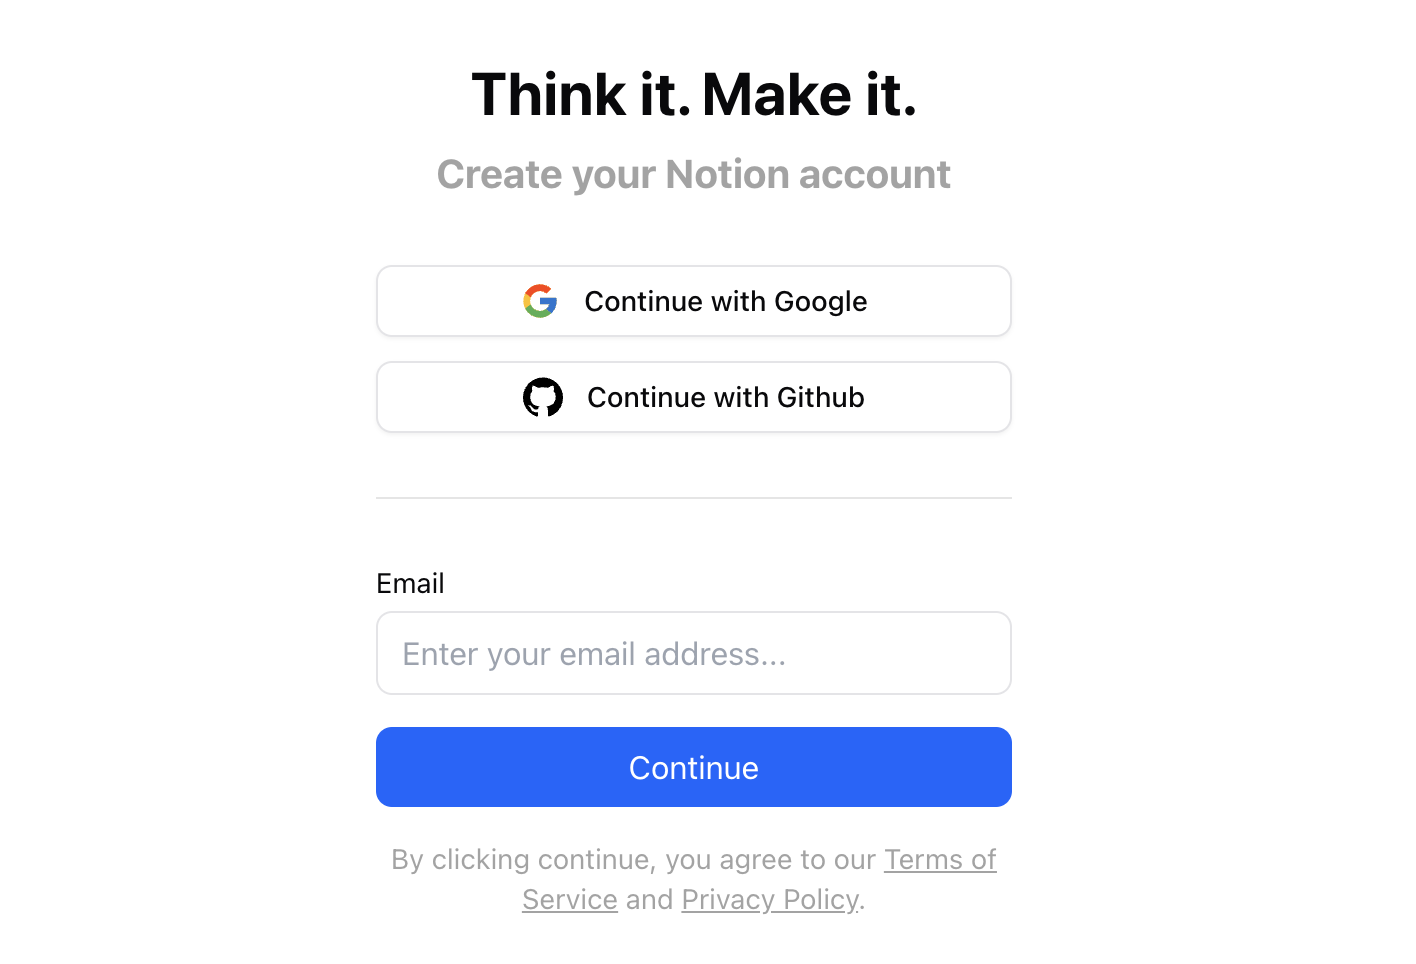
Edit app/signin/page.tsx to customize your authentication options. Here's an example using the NotionLike template:
const defaultConfig: LoginFormConfig = {
  title: "Think it. Make it.",  // Your welcome message
  subtitle: "Create your account", // Subtitle text
  supportEmail: true, // Enable magic link authentication
  authButtons: [
    {
      icon: "/social-icons/google.svg",
      text: "Continue with Google",
      provider: "google"
    },
    {
      icon: "/social-icons/github.svg",
      text: "Continue with Github",
      provider: "github",
    }
  ]
};
ShipNowKit supports the following OAuth providers:
Provider Description Provider Value Google OAuth 2.0 "google"GitHub GitHub OAuth "github"Facebook Login "facebook"Apple Sign in with Apple "apple"Twitter OAuth 2.0 "twitter"LinkedIn OAuth 2.0 "linkedin"Discord Discord OAuth 2.0 "discord"Slack Slack OAuth 2.0 "slack"Use these provider values in the
providerfield of yourauthButtonsconfiguration.
💡 Tip: Find social media icons in the /public/social-icons directory
Setting Up OAuth Providers
Step 1: Basic Authentication Configuration
Configure Next Auth (v5) in your .env file:
AUTH_DEBUG=false
AUTH_SECRET="your-random-secret-string"  # Generate a secure random string
Step 2: OAuth Provider Credentials
Add credentials for your chosen OAuth providers (see .env.example for specific environment variable names):
## GitHub
AUTH_GITHUB_ID=your_github_id
AUTH_GITHUB_SECRET=your_github_secret

## Google
GOOGLE_CLIENT_ID=your_google_client_id
GOOGLE_CLIENT_SECRET=your_google_client_secret

# Add other provider credentials as needed
Step 3: Magic Link Configuration (Optional)
If you've enabled email authentication (supportEmail: true), configure email settings:
[email protected]
MAGIC_LINK_EMAIL_SUBJECT="Welcome to Your App"
RESEND_API_KEY=re_your_resend_api_key  # Required for email delivery
🔒 Customizing Privacy Policies
Your authentication page includes links to privacy policy and terms of service. Customize these pages at:
- Privacy Policy: app/policies/privacy-policy/page.tsx
- Terms of Service: app/policies/terms-of-use/page.tsx